Welcome to Eddie O Bee Adventure

Hello,

This should be interesting. I have no experience in beekeeping, except what I can glean from others.

For timeline . . . the install date will be April 22, 2012

Please comment. I need all the help I can get!

Eddie O.

Wednesday, May 16, 2012

+57 Days: Signs of Honey

Both hives are +57 days after install and I was able to see a little honey in the short super I placed on the hive one week ago. I did not go deep into the hive since I did not want to disturb them as our major nectar flow begins to taper.

Some of the more experienced beekeepers have even declared our nectar flow all but over. I still see a lot of bees clumsily flying in with full sacs of pollen. Our magnolias have almost past and there are only a few remaining blackberry blooms in the backyard. I'm hoping the crape myrtles will be blooming soon.

Both hives have grown to huge populations, filling nearly all of the 10 frames in both deep boxes. It rained last week and in between the rain showers, I ran out and viewed the hive through the screened bottom board and there was a huge pancake of bees.

You can see the dark colored hone in the center of the frame

This is without the flash showing the honey in the center.


You can see there is only one remaining frame to build, the bees were boiling over.

Wednesday, May 9, 2012

A little Spring Cleaning

One of the things that interested me in the Atlanta Beekeepers shortcourse was learning about all of the different duties of the bees such as guard, mortician, and forager etc.  Another of the jobs is to keep everthing clean and polished.

It is getting close to 90 F here some days and the hives are getting stronger by the day, thus I decided to remove the entrance reducer. When I moved it, there was a bunch of dust/pollen as you can see below.


Here is a few days later . . . (no rain)..all polished up and cleaned.


Friday, May 4, 2012

First honey--just a few spoonfuls

The comb that I cut away from the last inspection was filled with sweet tasting honey/nectar. I placed it on a plate and brought it inside to add it to the comb collected from a previous inspections.

While putting away my inspection gear, my wife owned up to her title of McGyver and figured out a mini "crush and strain" system.

It is a 1 gallon Ziploc baggie, two clothespins, and a hole cut in the corner of the bag. We kept squeezing the comb, and letting it drain.


Here is our first honey

Tuesday, May 1, 2012

+35 days . . . Lookin' for Burr Comb in all the wrong places . . .

Singing Johnny Lee's 1980 song "Lookin for love" in all the wrong places, lookin for love in all the wrong faces . . .

Dang . . . that dates all of us who remember that one. John Travolta in Urban Cowboy.

Anyways, either the bees do not like the pierco plastic frames or they just wanted to make some wonky comb. Either way it was a mess . . they started to build comb away from the face of the frame rather than on it. It was located on the upper brood box and 2-3 frames away from the center.

At first I turned the frames around hoping for th ebest, but after thinking about it two days later, I figured the bees would not know what I envisioned as "hoping for the best". Thus, I scraped off a lot of this comb


Another view:


It was filled with honey, nectar or a little sugar syrup and jsut glopped everywhere as I used my hive tool to scrape it onto some cardboard.

They did fill some of the upper frames with brood. The population should be increasing exponentially.


Tuesday, April 24, 2012

Trying it barehanded: Not sure it is for me

I read where people use heavy gloves all of the time and some prefer no gloves at all. For the first month, I have tried a middle ground: nitrile rubber gloves.


For something different, I tried no gloves at all. I can tell you I was definitely more confident with the gloves on and very timid with my bare hands (and with a white knuckle grip on the frames) Not sure it is for me, but I will try it again and see how it goes.


One of my thoughts was that the rubber gloves were hindering my dexterity, but if it does, it is not much at all. If anything, the rubber gives a little more grip when manipulating the frame (even though the rubber gets caught when repositioning sometimes).

Sunday, April 22, 2012

+29 Days: 4th Inspection--Movin' on up!

Movin' on Up!

Yep, that's the song for this inspection.

I opened Hive#2: Big bee with the help of some of the kid's friends (after getting OK from parents). Since we are +29 days since the install, and the average lifespan being 40 days during this time of the year, many of the original bees have most died and have been replaced with new bees. These new bees are definitely a little more offended by my intrusion. No one, got stung, but it was a noticeable difference from earlier inspections and the other hive.

Hive#1 Busy Bee is the stronger of the two and I added a second deep brood super with plastic frames last week. During the week this week, anytime I would "check under the hood" and lift the cover, I noticed the inner cover was completely covered with bees. The population has definitely increased.

We never saw the queen in either hive, but we did see a lot of eggs, thus we know they have been there in the last 3 days. Since we are on our major nectar flow, the bees have not been taking the sugar water in the baggie feeders. They have also been "backfilling" a brood cell with nectar or pollen as a new bee emerges, thus reducing the effective number of brood cells. Adding another super will hopefully get them to move the nectar/pollen stores above the brood area.

I have read that one of the major factors in swarm prevention is to prevent backfilling. Essentially, these newly hatched bees job is to rear young larvae. If the overall number of brood cells are reduced because of backfilling, then the new bees are sitting around saying "hey there's nothing for me to do". . .  and another factor for swarming is added. Adding a brood box will hopefully give these new bees a place to build more comb for stores and brood rearing.

My goal is to build as large a population as fast as possible. . .  for two reasons . . . for a strong hive will have a better chance to survive the winter and second . . to possibly get some honey this year.

Here is a link to the pictures:


https://plus.google.com/photos/103266833998957671556/albums/5733615051979076785?authkey=COuI-4_xnOKU-AE#photos/103266833998957671556/albums/5733615051979076785

Here is a quick rundown of the +29 day 4th inspection:
  • One hive definitely stronger than the other
  • Added second deep brood box to weaker hive
  • Bees were "boiling" onto inner cover on weaker hive (also more aggressive than the other hive)
  • Somehow, I knocked one of the frames to the ground that was leaning against one of the hives .  .. they got a little stirred up from this!

Monday, April 16, 2012

+23 Days 3rd Hive Inspection--Added another deep brood

The third inspection was pretty routine . . . for once. I had the neighbors over for a chance to see some parts of the inspection.  It was a lot of fun showing all of them the different parts of the comb and we even got to the see the queen on one of the frames. I was afraid the queen would either fly away or even worse . . . I would drop the frame--so I quickly returned her safely back into the hive.

All in all, it was a pretty routine inspection . . . for once.

Here's a quick rundown:
  • No comb on top of the frames--moving the baggie on top of the frame was the ticket
  • Hive#1 is still stronger, I added a second deep brood box. There was one frame that was drawn with mainly nectar so I moved it to the middle of the new deep brood box.
  • I sprayed the new frames with sugar syrup to hopefully gain better acceptance
  • I left Hive#2 alone and will hopefully add another deep brood box at the next inspection
  • The bees were very docile, I used generous amounts of smoke whenever they seemed very "interested" in what I was doing.
  • Hive#1 Busy Bee: added deep brood--7-8 frames built out
  • Hive#2 Big Bee: 6-7 frames built out
No comb on top---Hooray!

Here you can see where the first wave of bees emerged from the capped brood. If you look close enough, you can see the queen has laid more eggs. I could not find the first queen, but was satisfied when I saw these eggs (at least the queen was here within 3 days)


 Again, you can see where the bees had emerged (towards the bottom), capped brood (middle to upper right) and the fresh new white wax that is capped honey). The other colors such as orange is pollen.


We saw something that we had not expected . . . a few bees emerging. They were eating away the cover of their cell and emerged. It was really neat and we felt like wee witnessed something very special.


One of Georgia's few Master Beekeepers said this is the earliest nectar flow he has ever seen. One result is the abundance of pollen and nectar. I an a little concerned that the bees are filling areas in the brood area as soon as a new bee emerges. you can see in the picture above.

Below is a neat picture. it shows the Queen with the yellow dot, capped honey on the far left, pollen next to that (orange and white), larva in various stages and sizes in the top middle area. recently capped brood in on the bottom right.


I found these towards the bottom of a frame, not sure if it is big enough to be queen cups, I am thinking (and hoping) they were just drone cells that are sticking out. For reference, the cups are sitting on the end of a normal hive tool. 


Things I learned:
  • When using the baggie feeder, you need to have a level spot so the baggie does not leak when you remove it from the hive while inspecting (I left it  sitting on the inner cover)
  • The plastic frames seem to be a little wider than the wooden ones (they are more difficult to push back into place)
  • I am seeing a lot more dead bees (especially drones). It's not a result of the robbing, but the bees that came in the package are getting a little older.

Friday, April 13, 2012

Swarming--What to do--How to cause/prevent

I ran across a great post on the Beesource Forum about hive splits

Here is a copy of one of the posts:


FlagStaffBaughs, Queen caps are common and may never get used. Better to interleave frames of foundation with two frames of brood. Basically it's just opening the brood nest. The interweaving is so they can't ignore the foundation, if it's on the sides it may get ignored.

Splitting a hive is often done to prevent swarming, but when you consider the factors involved in the lead up to swarming, it becomes apparent that you can actually exacerbate the impulse to swarm rather than relieve it with splits.

Example of a split increasing likelihood of swarming.
Remove all frames of open brood and eggs from the parent hive, placing them in a Nuc. Also take two frames of stores. Leave queen in the parent hive. Move all frames in parent hive together in the middle and place frames of foundation on the sides.

Analysis
In the parent hive there is nowhere for the queen to lay. Foragers have no where to store nectar and pollen so fill cells as soon as brood emerge. A large number of Nurse bees are unoccupied. Foundation on the outsides of the brood nest will not likely get drawn. So the parent hive is still likely to swarm.


Example of a split decreasing likelihood of swarming.Move parent hive at least a few feet away from original location. Place a new hive in the original place of the parent hive. Move one frame with eggs and two frames of capped brood to the new hive. Also move one frame of stores with a frame of foundation between the brood frames and the stores frame. In the parent hive place foundation in the broodnest alternated with a least two frames of brood.

Analysis
The foragers will go to the new hive. Being queenless the new hive will build queen cells and raise a new queen. Due to no where to store all the nectar coming in from the large number of foragers, it forces them to build comb. They won't swarm because they don't have a queen and because they have open brood. It will take up to a month before the queen starts laying.

The old hive has no incoming resources due to no foragers, so empty cells from emerging brood remain empty until the queen can lay an egg in them. Alternated frames of (2) brood and (1) foundation force the Nurse bees to build comb. Which allows the queen more space to lay and so keeps the Nurse bees busy. There would usually be enough stores in the hive to last them several weeks. By that time young bees have started foraging.

Matthew Davey
   

Wednesday, April 11, 2012

Water Source for Bees: Making it more attractive

One of my goals is to be as good a neighbor as possible. I oriented the bee's flight line in between my house and another neighbor. One of the reasons I aimed them this way is because our other neighbor has a pool. Growing up, I always remember bees being attracted to pool water. They never bothered or stung anyone . . we would always just flip them onto the concrete and they would dry off and fly away.

Thus, I bought a mixing tub for $5 at Home Depot for the watering source. Since the sides were slippery, I added two bricks and large rock that you can see below. I was worried that the piece of wood was treated, thus I removed it.


I moved the tub to a few different locations because I never saw bees visiting my pool, thus I did some research . . .


One thing I read was they seem to be attracted to dirty water. One suggestion was to add a towel and some bleach (simulates chlorine that bees love so much). I also added some salt for minerals, and even a little sugar on the towel to sweeten the deal some. This still was not good enough . . . then I heard to spray lemon scented Pledge on the ground around the tub . . . THIS was the magic that finally lured the bees. I supposed you could use lemongrass oil as well.


I also used some of my swarm lure that consisted of lemongrass oil and beeswax. Within a few minutes, the first bee arrived. (but it was the lemon scented Pledge that really made the difference).


Later, while checking on my drip irrigation for the garden, I noticed they seem to like my "button" drippers (hard to see below, but it is hanging on at the 6 o'clock position.


Another bee getting a sip from my drip irrigation


Tuesday, April 10, 2012

+17 Days: 2nd Hive Inspection

We pounded out the miles coming home from vacation . .  got through the bottleneck south of Atlanta (Hamton/McDonough area) relatively unscathed and arrived home about 4:30 pm. I was opening the first hive about 5:15.

I let my son puff some smoke at the entrance and opened hive #1 (Busy Bee). Much to my regret, the bees had started to build and fill comb that was in the 3 inch riser that housed the ziploc feeder. The 1 gallon ziploc was completely empty.

Here is what I saw: They had started to build comb on top of the frames


 I smoked a few more times, and looked down on the frames. It's a 10 frame super--on both sides the two outside frames were not really even touched. I was able to move the frames with relative ease (not too much propolis yet). I worked towards the inner frames that were built out very well.

I was surprised at the weight of each frame. You have to wonder how many trips it must have taken to work towards that combined weight.

Below, you see capped honey on top, a ring of pollen, nectar--and in the middle, the capped larva.


Although a little blurry, you can see a better view of the capped brood, at 6 o'clock, you can see some fat white larvae. The uncapped cells were filled, but with nectar/sugar?


A good view of the queen


Another very heavy frame with capped honey (white), pollen (black, blue, dark yellow, orange) and mostly capped brood in the middle.


As mentioned in a previous post, I scraped off all of the comb so the kids could take to school.


Now, it was Hive #2: Big Bee


We popped the top off the second hive and they did not build very much burr comb. I noticed this hive was a little weaker than the previous one. It only had about 5-6 frames that were being worked on where the other had a full six (maybe a little on the 7th). They were drawing it out nicely.

Again, I was surprised at how heavy the frames were. It was very interesting to see the different colors of the pollen. I had no idea the range of colors. I have always thought of yellow. I will look into what colors would generate these colors.

This was interesting since it showed all of the different colors:


Below, you can see the well defined areas (if a little lopsided)


The reverse side of above:


I also got stung while carrying the above frame over to show to my wife. I was fairly certain this one was queenless, so as I was getting a better grip on the frame to show her, I must have squashed a bee . . . she did not like and gave me a quick sting. This caused the following chain reaction: As I got stung, I instinctively flinched and removed my hand from supporting the frame which began to swing via gravity. I then quickly lowered the frame in case I lost my grip with the other hand, and it sort of banged on the ground . .  ejecting all of the bees onto the leafy pinestraw area.

My pride wincing from my first sting and realizing the queen could possibly be on the ground, I knelt down and looked at each bee and made sure the queen was not on this frame. My fears were alleviated when I found her on another frame.

Here is what I learned on the +19 Day 2nd Inspection:

  •  Amazing how heavy the frames are getting (imagine how many trips)
  • One hive doing better
  • I used generous amounts of smoke
  • Built comb in all the wrong places
  • Smoke was bad for me too
  • Got stung for first time
  • Neighbors asked about the bees
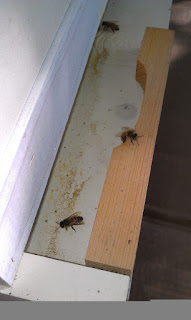
  • Still not using my water source (someone suggested a little salt & sugar to attract)
  • Big Bee  5-6 frames drawn, 1.5 gallons syrup so far
  • Busy Bee 7 frames drawn, 1.25 gallons syrup so far
  • Comb on Big Bee not gone--need to retrieve
  • Need more syrup (I only added quart bags)
Thoughts for follow-up:
  1. What different colors of pollen represent
  2. How to get bees more attracted to my water source
Eddie O.

Monday, April 9, 2012

More Comb in the wrong places

Ooops--I have made another mistake . . . one of the Beesource members suggested I move the ziploc baggies feeder above the inner board. I was all set to go ahead and do this and made a last second decision to leave it alone.

I come back from the kid's spring break and it looks like they used the time to build comb on top of the frames . . . on the other hive. I saved this comb for later use.

The initial "Holy Comb" post was on the other hive. Both baggie feeders are now above the inner cover.

--Eddie O.


Friday, April 6, 2012

2nd Hive Inspection Checklist

It has probably been good that I have been away on vacation. I'm sure the bees are saying "maybe that guy will finally leave us alone for a little while". I guess I am the Attention Deficit Disorder (ADD) of beekeeping . . . I probably watch and monkey with them a little too much.

So now that I have been on a little break (and given the bees a little break) . . . I am gathering my thoughts about my second inspection which will be +16 days after install (Sunday)

2nd Inspection: What the bees are supposed to be doing . . .
  1. Queen laying eggs
  2. Raising young
  3. Collecting pollen & nectar
  4. Building comb
  5. Capping honey?
  6. Strength of hives? need to add brood to weak one?
  7. Problems?

Here is what the Dummies book says: Getting ready
  1. Open the hive between 10:00 am - 5:00 pm: Sunny day to look for eggs/larvae
  2. Get geared up and light smoker, no scents (put away your Old Spice)
  3. Puff some smoke at entrance/top wait a few minutes
  4. Remove top and inner cover (pray no comb in the top feeder area)
  5. Use hive tool to move the #2 or #9 frame (10 frame box) to break it loose
  6. lift straight up. Avoid killing bees.
  7. Using #2 or #9 allows to place the final frame back into it place without squishing bees against the hard side of the box, doing this way is bees against bees
  8. Lay next to hive in vertical position
Manipulating the frame: (again here is what Dummies book says:)
  1. Hold frame by the tabs, Get a good grip. (retaliation for a mixup here is swift)
  2. Turn the frame vertically (one hand head high, other at about waist)
  3. Then turn the frame like a page on a book.
  4. Then return back to horizontal position to view other side of frame
Part 2:  Goals for my second hive inspection: Checking for Queen
  1. Finding the actual queen not essential, but evidence of good queen essential
  2. Use sunlight to help to check for eggs/larvae
  3. See previous posts for egg shape and relative size
  4. If you see eggs  . .  you at the very least know if queen was here within last 2-3 days
  5. Since I am +16 days, I should hopefully see eggs, larva and capped cells
Part 3: Checking Brood Pattern & Foodstuffs
  1. A tight brood pattern is good, spotty is bad and indicates something wrong with queen
  2. The brood will be in a football shape when looking at the frame. In 3D I guess it would look like a large oval looking rock with a flattened top.
from USDA.gov
      3.  Pollen and stores around the "football"


Part4:  Ready for another super?
  1. When 80% all but outside frames are fully drawn, we will add super.
  2. I asked Beesource members and I will add a deep on one and medium for brood on the other (that is my inventory, I would add another deep if I had one)

I'm excited to see what happens. I'm still worried that the little buggers will be adding comb to the ziploc feeder area. I will bring rubber bands to add this comb to the super I plan on adding.


Sunday, April 1, 2012

+12 Days After Install: What happens next?

I am finding myself to be more of a "What next?" beekeeper. For me (probably like most) simply don't have the time to read all of the books on beekeeping. I have two kids in constant sports and activities.
When I do pick up a book, I seem to skip all of the parts about entomology and history and go straight to what I need to know at that point.

Now that I am +7 days since my install, I find myself asking "What happens next?"
  1. When will the newly laid eggs emerge as bees?
  2. What is the bee lifecycle?
  3. How many eggs will the queen lay in the tall brood area?
Picture Credit: www.cwf-fcf.org

Quick Timeline:
  • Days 1-3--Egg: 1st day is stands vertically, 2nd day is bends over, 3rd day it falls over
  • Days 4-9--Larva: next three days it is fed royal jelly. Then fed a mixture of pollen and honey (bee bread) and the cell is capped.
  • Days 9-21: Pupa:  Non-feeding stage. Larva spins cocoon to become Pupa. Body parts develop. on 21st day, it bites its way out as an adult.
  • Day 21+: Adult: It emerges as with a grey color.
Adult timeline:
  • 1-2 Cleans cells and helps warm broodnest
  • 3-5 Feeds older larvae with honey and pollen
  • 6-11 Feeds your larvae with royal jelly
  • 12-17 Produces wax and constructs comb, ripens honey
  • 18-21 Guard the hive entrance and ventilate the hive
  • 22+ Forage the nectar, pollen, propolis, and water
Below is a picture of some eggs that I guess must be 2-3 days old (since they are laying over)


Below, you can see some nice fat larvae that are ready to be capped.


Here is a great picture from the "Busy Bee" Hive after 23 days (I came back to add this). You can see the queen in the middle with yellow dot,  white capped honey on the left, orange and white pollen next to the honey, and larvae in various stages and finally . .  capped brood on the bottom right.


So, when I do inspection #2 in seven days (+16 days) I'll hopefully see some capped pupas, larva being fed and additional eggs.


Friday, March 30, 2012

+9 Days: Three Since the "Holy Comb" Incident--all is good


+3 Days since the "Holy comb" incident and it looks like they took the hint and are not trying to rebuild the comb on top of the frames.

A Beesource Member suggested I move the baggie feeder above the inner cover rather than below. I ran home during lunch (rain tonight) and took over the inner cover . .  . expecting more comb . . . and nothing! No evidence on the inner cover or on the tops of the frames.

Thus, I just let them be (bee) and did not move the baggie. It was still about 2/3 full.
Baggie feeder still about 2/3 full.
A lot of bees visiting the feeder

Drawing comb out nicely


Evidence of comb from "Holy Comb" incident